This admin procedure will provide background information on creating a data retention label that will be auto applied to a specified data type and location.
This article is intended for employees of organizations that use Sittadel's security. Additionally, there are some actions that can only be accomplished by those with administrative privileges.
Retention Labels
Retention labels are labels that you can apply to data in SharePoint, OneDrive, Teams, and Exchange. They ensure that data is retained for a required timeframe and define if content should be locked as a record in the meantime and if it should be deleted after the retention period has ended. Auto-Apply will enforce labels on content that matches the conditions specified.
Procedure Scope: Administrators
Required Group Membership: Admin.Compliance
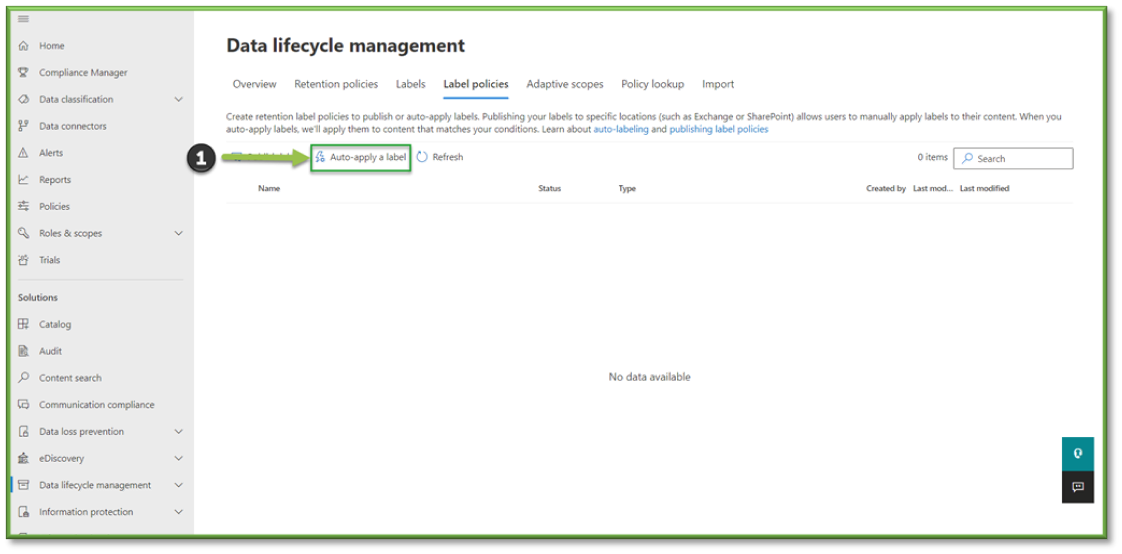
Creating an Auto-Apply Retention Label Policy
- Navigate to Retention Label Policies – Purview, select Auto-Apply a Label.
- You will be asked to provide basic information for the policy, such as name and description. Select Next to continue.

- Next you will be able to configure the type of content that the auto-apply with search for. Select Next to proceed.
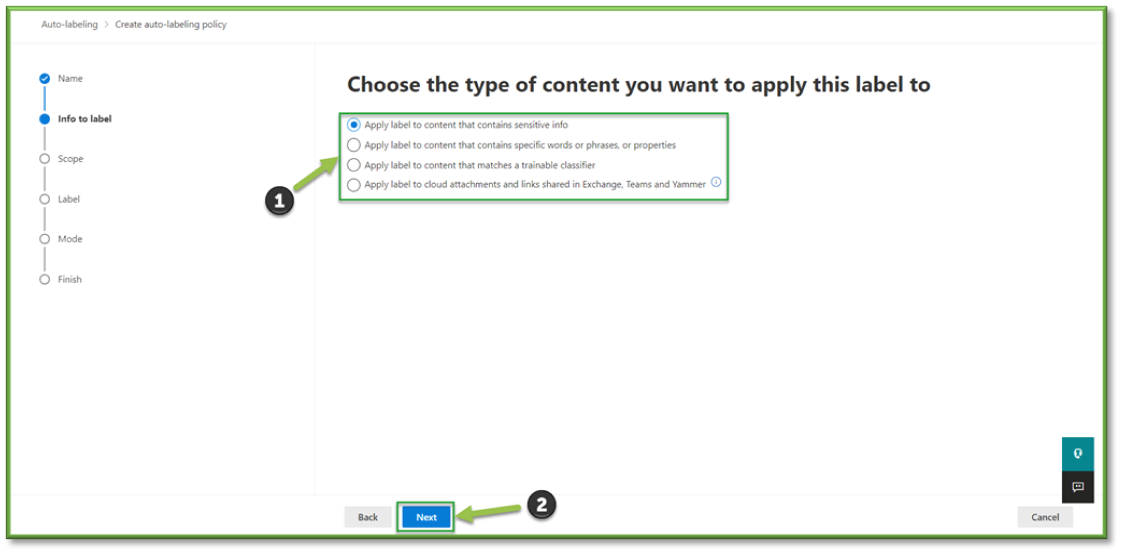
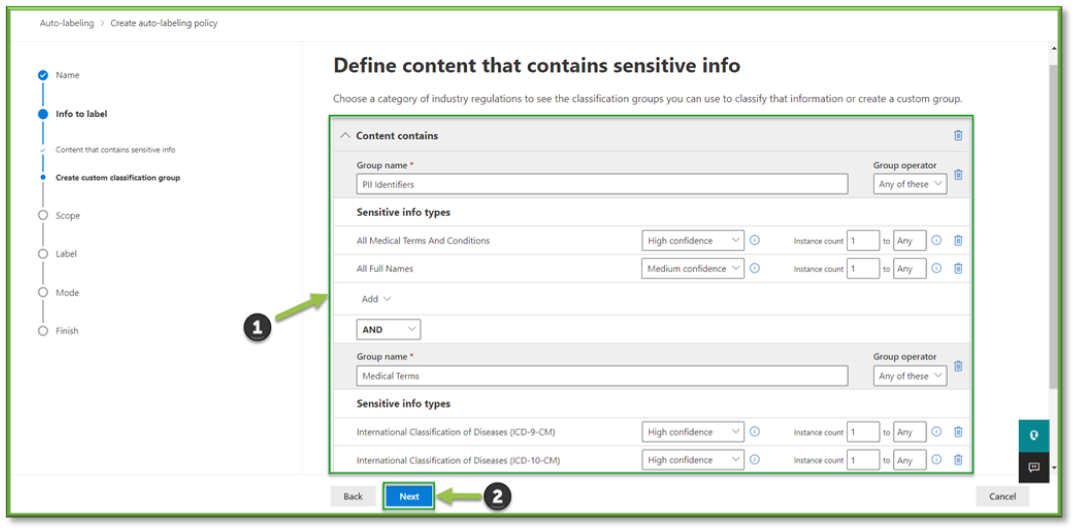
- You will be able to specify the type of content the policy will apply to; either a preconfigured template from a Microsoft defined category or a custom rule creation can be generated. Select Next to continue.

- You can define the scope of the previously selected template or custom rule, once the rule fits the scope of what items you want it to apply to, select Next to proceed.
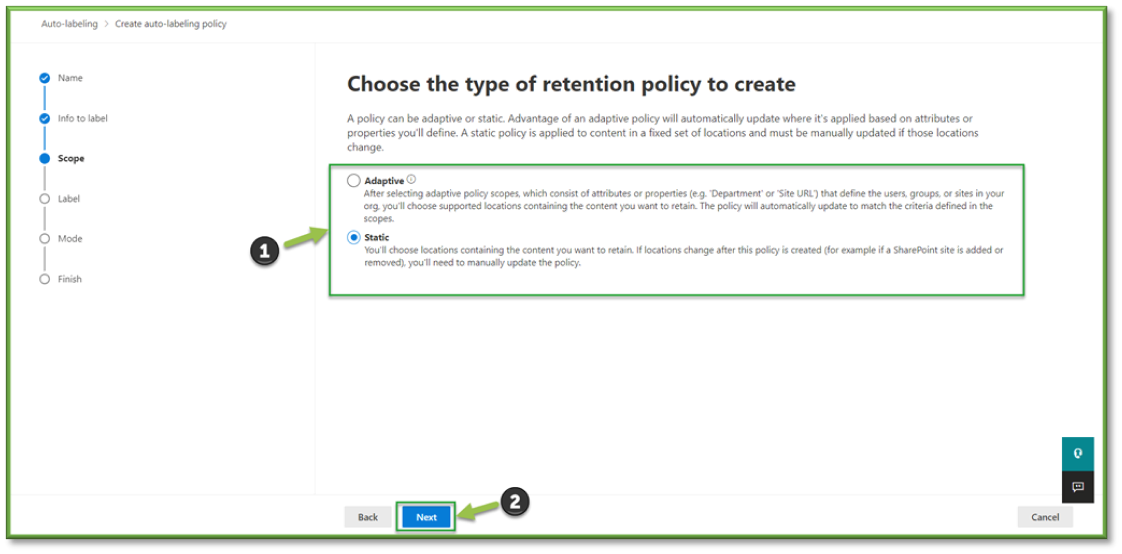
- Next you will define which type of retention policy you want to configure; either adaptive (requires E3 licensure) which will identify items off properties or static which will look at a specific location for analysis. Select Next to proceed.
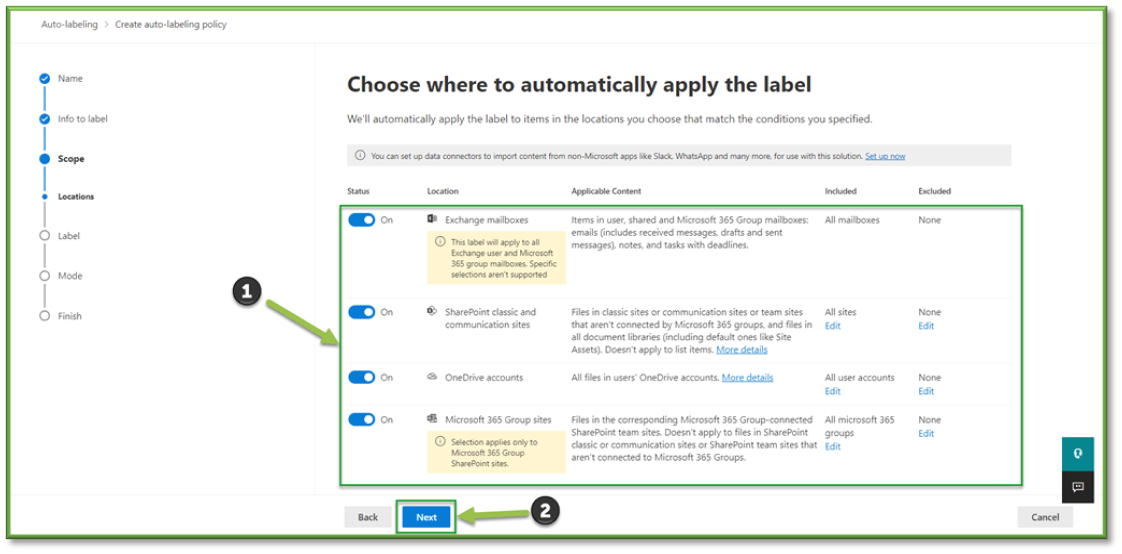
- You will apply the areas to which the policy will scan for items. Select Next to proceed.
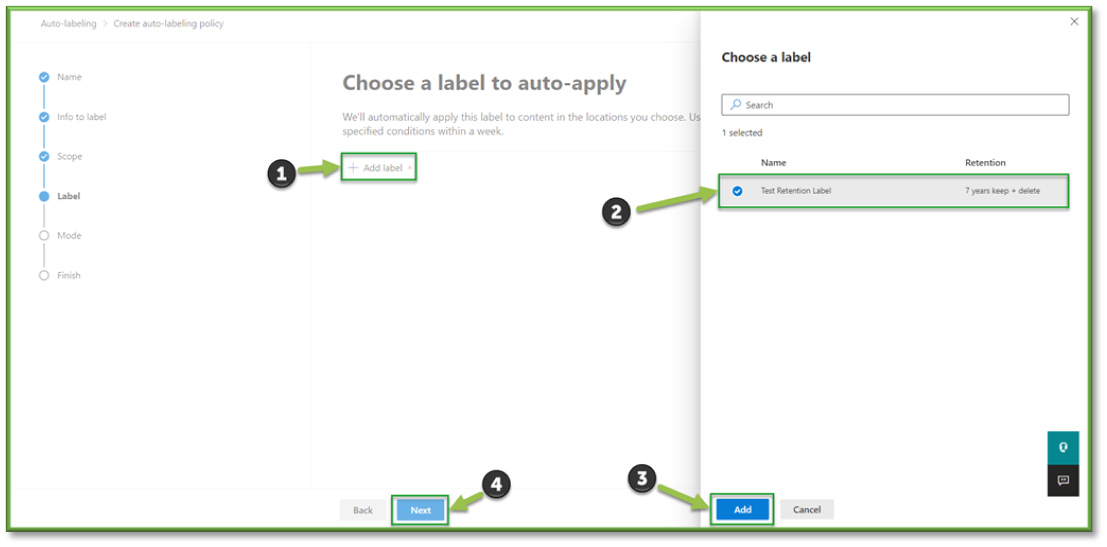
- You will need to determine which label you would like to apply to the policy, select Add Label. A pop-up will display all of the created labels, select the one you want and select Add to apply it. Select Next to continue.
- Next you will choose whether to turn on the policy right away or enable a testing mode prior to deployment. Select Next to proceed to revisions.

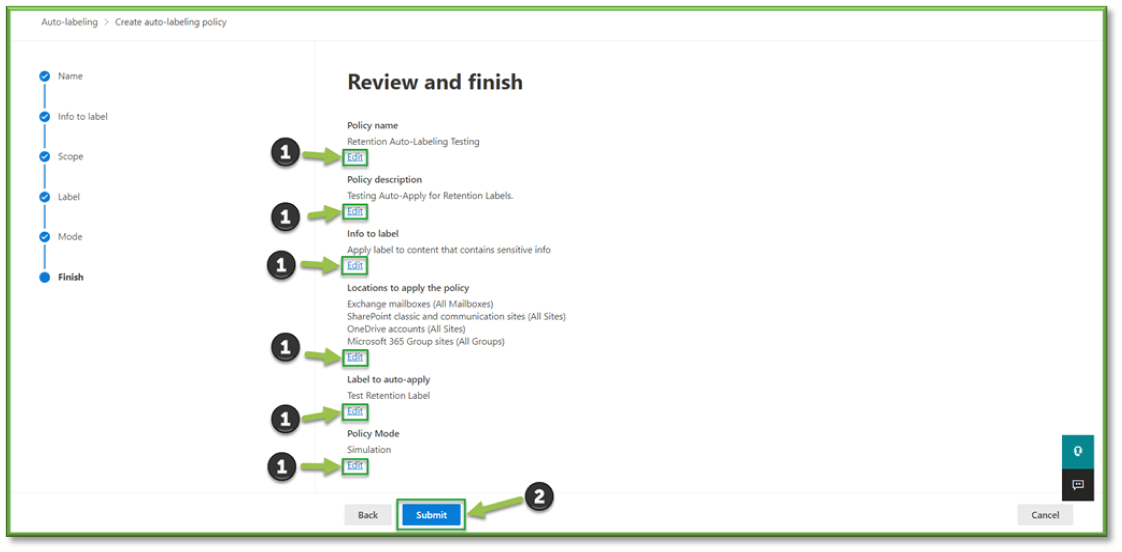
- At the revisions page, if you detect a discrepancy select the Edit button below the section that contains the incorrect information. If everything checks out, select Submit to finalize the creation process.
- A final prompt will display that the policy will be running in a simulation mode until it is enabled. Select Done to finalize the creation process.

You're Finished!
You should have successfully created a new data retention label that will auto applied to the specified data location such as Outlook or SharePoint and be applied when the item leaves the specified container. For any other problems or questions, reach out to us!