This admin procedure will provide background information on modifying an existing auto-apply data retention label.
This article is intended for employees of organizations that use Sittadel's security. Additionally, there are some actions that can only be accomplished by those with administrative privileges.
Retention Labels
Retention labels are labels that you can apply to data in SharePoint, OneDrive, Teams, and Exchange. They ensure that data is retained for a required timeframe and define if content should be locked as a record in the meantime and if it should be deleted after the retention period has ended. Auto-Apply will enforce labels on content that matches the conditions specified.
Procedure Scope: Administrators
Required Group Membership: Admin.Compliance
Modifying an Auto-Apply Retention Label Policy
- Navigate to Retention Label Policies – Purview, locate the policy you wish to alter. Select Edit to begin the modification process.
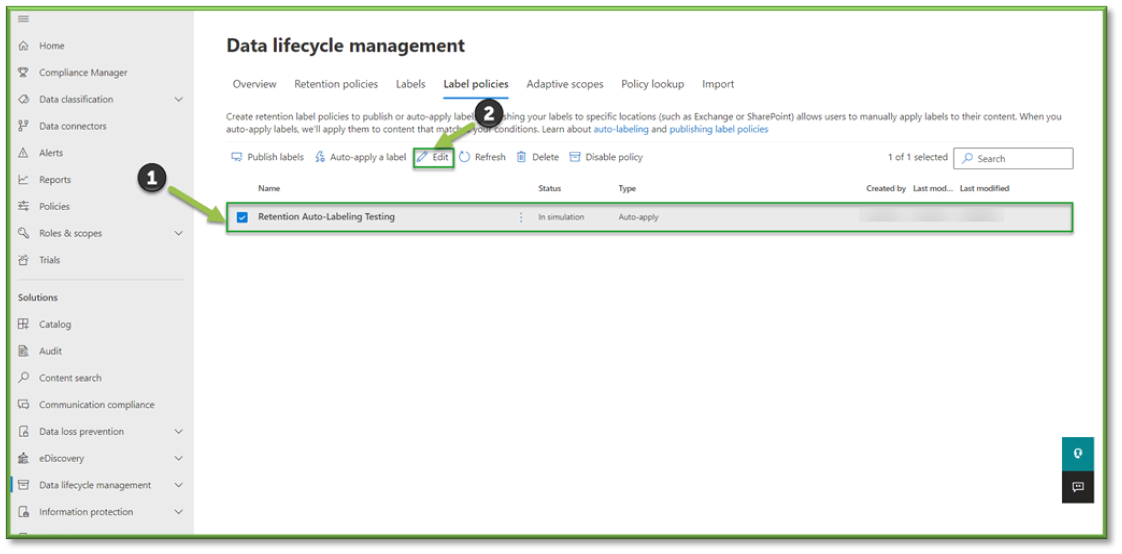
- Upon opening the policy, all the information of the label will be displayed. 4 points of interest will be available to Edit. You can modify the sections as needed.
- Name: Adjusts the non-functional elements of the label, only Description is available for modification.

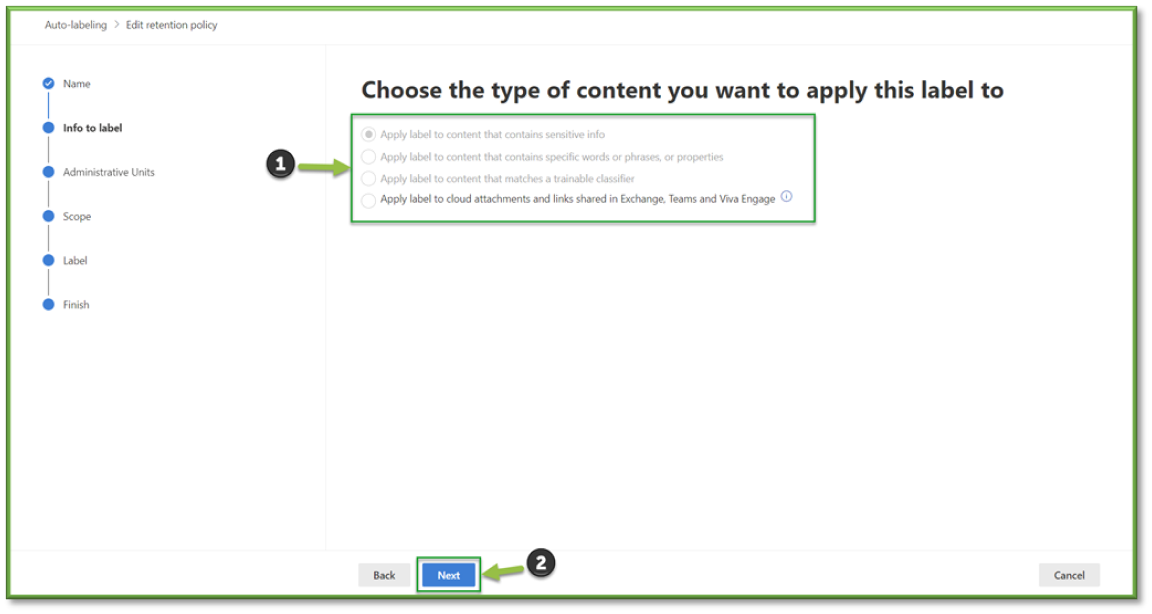
- Info to Label: Specifies the type of content you want to auto-apply the label too the content can vary from sensitive info possession to known cloud attached items. This section cannot be modified after creation. Depending on the content type selected, you will be able to adjust the parameters for the conditions set on the following pages.
- Scope: Specifies the way items will be enforced, either on a set platform or if they contain similar properties to what has been outlined. This setting cannot be modified after its initial creation. Depending on set scope, you will be able to adjust the platforms that will be monitored by the policy.

- Label: Specify the retention label that will be utilized by the auto-apply policy.

- Name: Adjusts the non-functional elements of the label, only Description is available for modification.
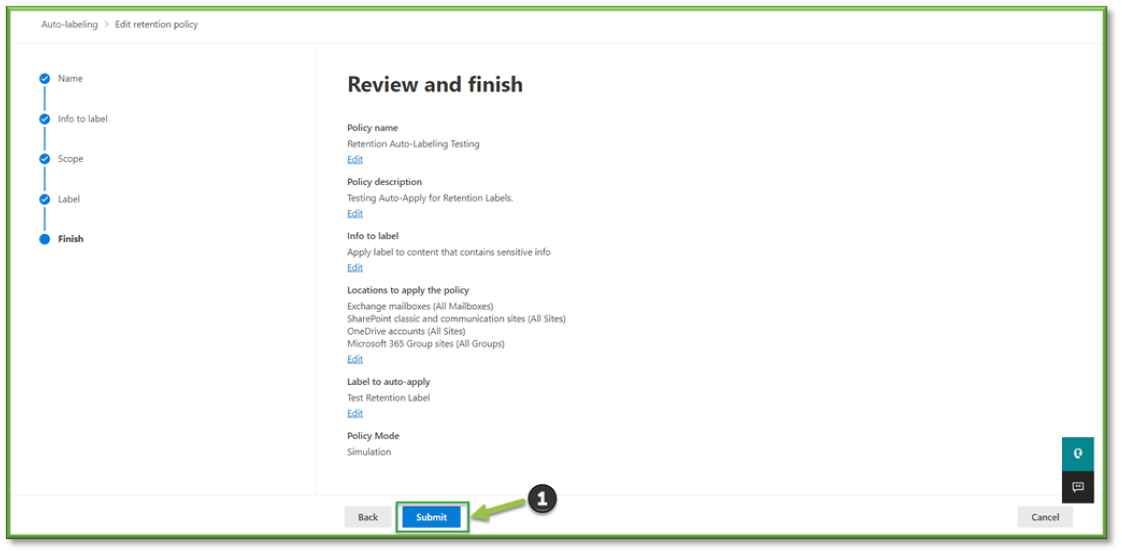
- Once the necessary change has been made, the last step is to finalize revisions by selecting Submit.
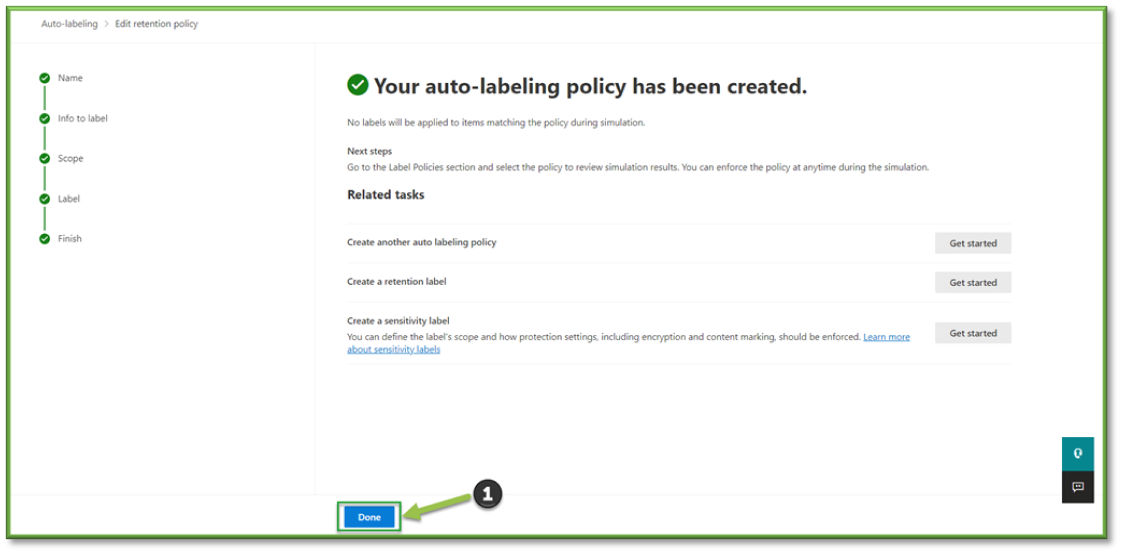
- A final prompt will notify you that the label has been updated, select Done to finalize the modification process.
You're Finished!
You should have successfully modified an existing data retention label that will auto-apply to the specified data location such as Outlook or SharePoint and be applied when the item leaves the specified container. For any other problems or questions, reach out to us!