This admin procedure will provide background information on viewing held emails that have been captured due to non-compliance with threat policies; breaking down message details associated with the email and actions that can be carried.
This article is intended for employees of organizations that use Sittadel's security. Additionally, there are some actions that can only be accomplished by those with administrative privileges.
Administrative Quarantine
Quarantine holds potentially dangerous or unwanted messages that were detected by Microsoft built-in or custom threat policies.
Admins can view, release, and delete all types of quarantined messages and files for all users.
Admins can also manage files that were quarantined by Safe Attachments for SharePoint, OneDrive, and Microsoft Teams and Microsoft Teams messages that were quarantined by zero-hour auto purge (ZAP).
Procedure Scope: Administrators
Required Group Membership: Admin.Quarantine
Viewing Quarantined Email Details
- Navigate to Quarantine – O365 Defender, all messages that have failed to meet threat policy compliance will be listed. Select a quarantined message by clicking anywhere in the row other than the check box.
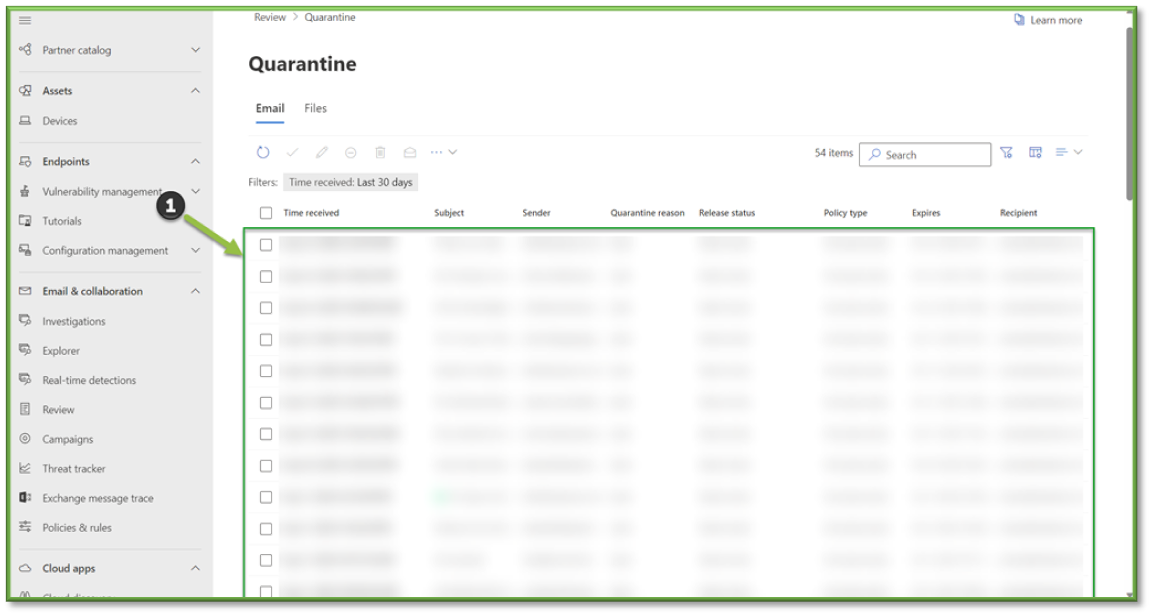
- A pop out that has additional details that will aid in administrative decision making with quarantine message handling will be displayed.
-
In the details flyout that opens, the following information is available:
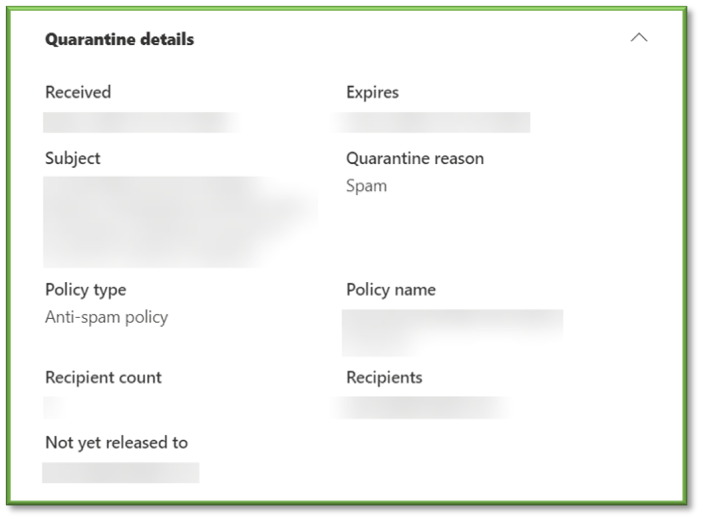
- Quarantine details section:
- Received: The date/time when the message was received.
- Expires: The date/time when the message is automatically and permanently deleted from quarantine.
- Subject: The subject of the email.
- Quarantine reason: Shows if a message has been identified as Spam, Bulk, Phish, matched a mail flow rule (Transport rule), or was identified as containing Malware.
- Policy type: The threat policy category that the email failed compliance for.
- Policy name: The name of the policy that has been triggered.
- Recipient count: The number of recipients that the mail has been sent to.
- Recipients: The specific addresses associated with the recipient. If the message contains multiple recipients, you might need to use Preview message or View message header to see the complete list of recipients.
- Released to: All email addresses (if any) to which the message has been released.

- Delivery details section:
- Threats
- Delivery action
- Original location
- Latest delivery location
- Detection technologies
- Primary override


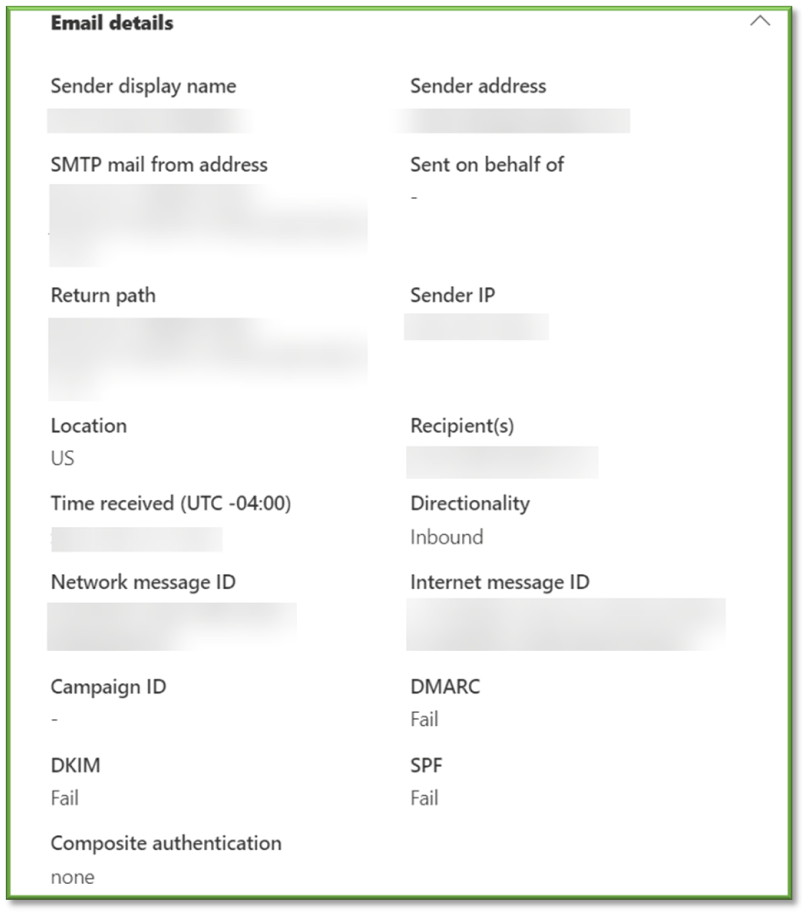
- Email details section:
- Sender display name: Display name associated with the sender, portion of the from section that does not include the [@] domain portion.
- Sender address: Address associated with the sender, if the display name and the address do not match or follow a similar formatting this can be an indicator of something suspicious.
- SMTP Mail From address: Indicates the address used by the mail client or application.
- Sent on behalf of: Indicates that the mail was sent from another user, this will bring awareness to who initiated the message send.
- Return path: Used to verify the identify of where the email originated from, if this address differs from the SMTP Mail From Address, this could be an indicator of something suspicious.
- Sender IP: The IP address associated with sender.
- Location: The location based on the associated IP address.
- Recipients: The address associated with the recipient.
- Time received: Provides the Date and Time the message was received.
- Directionality: Specifies if the mail is inbound or outbound.
- Network message ID: A network message id is a unique identifier for a digital message, most commonly an email. It is generated by the sending mail server or host and has a specific format that is a subset of an email address. The message id can contain the name and location of the server that generated it and can be used to trace the message hops in the internet header.
- Internet message ID: A unique identifier that refers to a particular version of a particular message.
- Campaign ID: A unique number used to calculate the success and allows for reporting on groups of campaigns.
- DMARC: Domain-based Message Authentication Reporting and Conformance (DMARC) tells a receiving email server what to do given the results after checking SPF and DKIM. A domain's DMARC policy can be set in a variety of ways — it can instruct mail servers to quarantine emails that fail SPF or DKIM (or both), to reject such emails, or to deliver them. A success or fail will be applied to this section based on the result of the DMARC check.
- DKIM: DomainKeys Identified Mail (DKIM) enables domain owners to automatically "sign" emails from their domain. DKIM uses public key cryptography; a DKIM record stores the domain's public key, and mail servers receiving emails from the domain can check this record to obtain the public key, the private key is kept secret by the sender, who signs the email's header with this key, Mail servers receiving the email can verify that the sender's private key was used by applying the public key. A success or fail will be applied to this section based on the result of the DKIM check.
- SPF: Sender Policy Framework (SPF) is a way for a domain to list all the servers they send emails from. SPF records list all the IP addresses of all the servers that are allowed to send emails from the domain, mail servers that receive an email message can check it against the SPF record before passing it on to the recipient's inbox. A success or fail will be applied to this section based on the result of the SPF check.
- Composite authentication: Helps identify spoofed senders and phishing emails when senders do not use SPF, DKIM, and DMARC authentication.

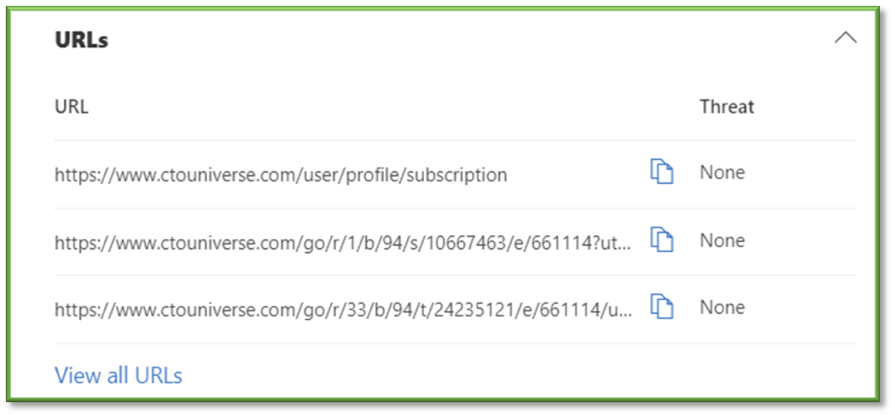
- URLs section
- URL: Provides a list of all URLs that were housed within the email.
- Threat: Indicates if any of the housed URLs show signs of being malicious or compromised.

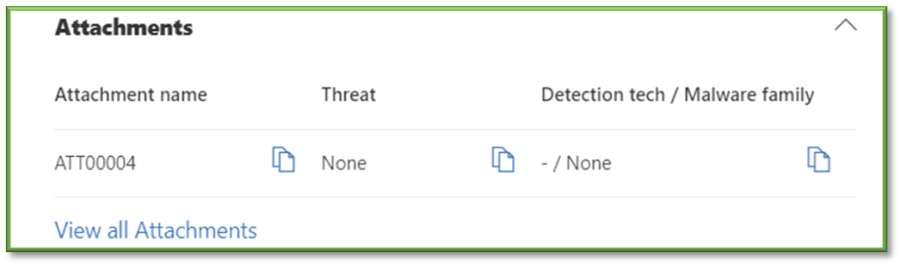
- Attachments section
- Attachment name: Provides the name of the attachment.
- Threat: Indicates if any of the provided attachments are malicious.
- Detection tech/Malware family: Provides additional information on the type of malware that might be present within the attachment.

Actions for Quarantined Email
- Navigate to Quarantine – O365 Defender, all messages that have failed to meet threat policy compliance will be listed. Select a quarantined message by clicking anywhere in the row other than the check box.
-
A pop out that has additional details that will aid in administrative decision making with quarantine message handling will be displayed.
-
In the details flyout that opens, the following actions are available:
- Release email.
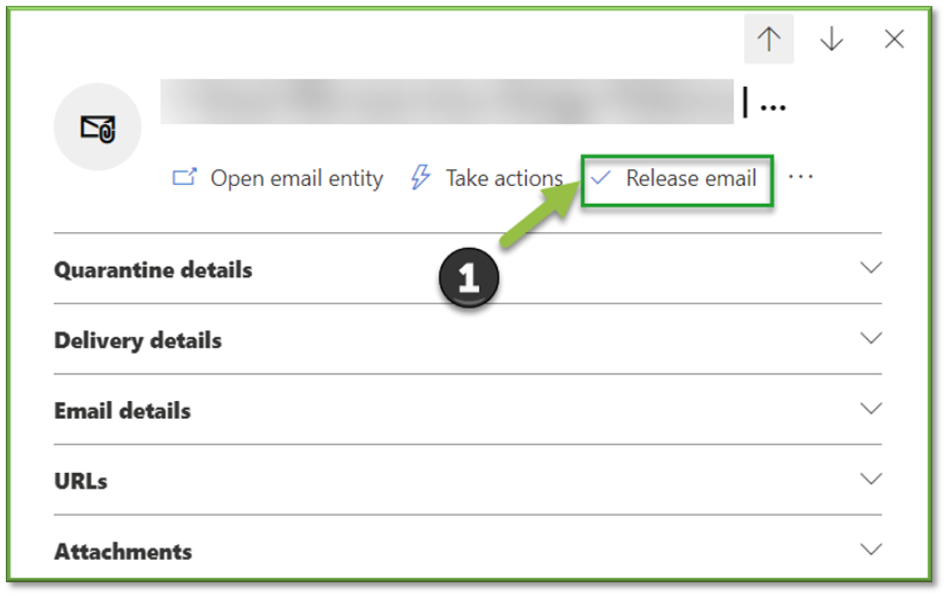
This action isn't available for email messages that have already been released (the Release status value is Released).
You can't release a message to the same recipient more than once.
When you select individual original recipients to receive the released message, you can select only recipients who haven't already received the released message.
Releases should only be carried through on emails that have been verified clean by an administrator; proper analysis of email details and additional analysis on email headers should be conducted prior to release or creating an allowance for the sender.
In the Release email to recipient inboxes flyout that opens, configure the following options:
- Select one of the following values:
- Release to all recipients
- Release to one or more of the original recipients of the email: Enter the recipients in the Recipients box that appears.

- Send a copy of this message to another recipient: If you select this option, select one or more recipients by clicking in the Recipients box that appears.

- Submit the message to Microsoft to improve detection: If you select this option, the erroneously quarantined message is reported to Microsoft as a false positive.

- Depending on the results of their analysis, the service-wide spam filter rules might be adjusted to allow the message through.
- Selecting this option reveals the following options:
- Allow email with similar attributes: If you select this option, allow entries are added to the Tenant Allow/Block List for the sender and any related URLs or attachments in the message.
The following options also appear:
- Remove entry after: The default value is 30 days, but you can also select 1 day, 7 days, or a Specific date that's less than 30 days.
- Allow entry note: Enter an optional note that contains additional information.

- Allow email with similar attributes: If you select this option, allow entries are added to the Tenant Allow/Block List for the sender and any related URLs or attachments in the message.
- Selecting this option reveals the following options:
- When you're finished on the Release email to recipient inboxes flyout, select Release message.


- Approve or deny release requests from users for quarantined email.
These actions are available if the quarantine policy used Allow recipients to request a message to be released from quarantine (PermissionToRequestRelease permission) instead of Allow recipients to release a message from quarantine (PermissionToRelease permission) when the message was quarantined. This will allow users to submit request to release quarantined mail which would then need administrative approval.

- Share email from quarantine.
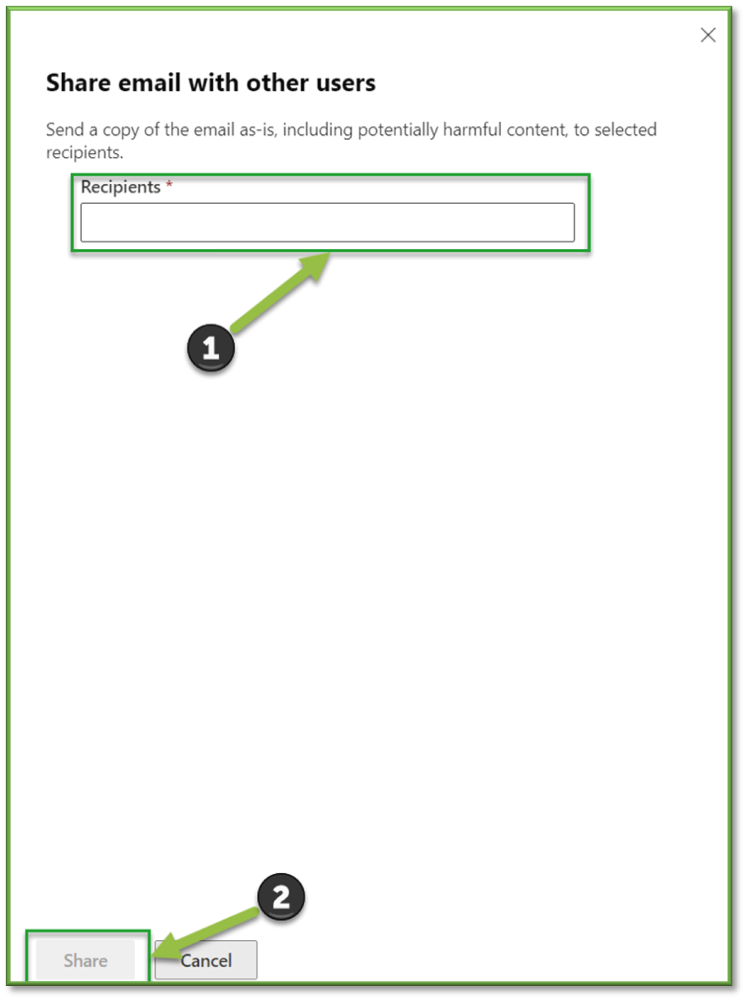
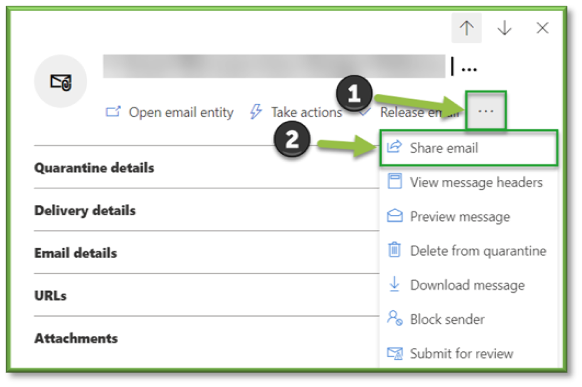 You can send a copy of the quarantined email message, including potentially harmful content, to the specified recipients.
In the Share email with other users flyout that opens, select one or more recipients to receive a copy of the message. When you're finished, select Share.

- View Message Headers
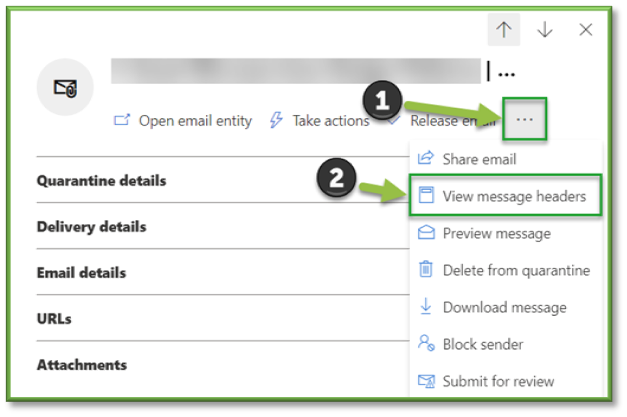
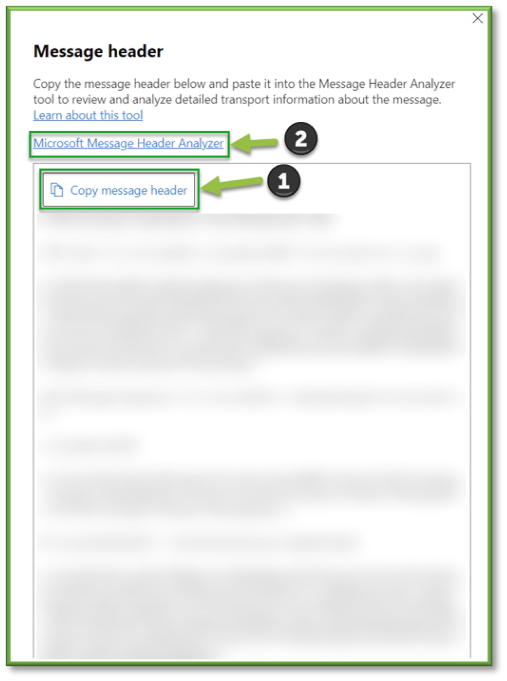
In the Message header flyout that opens, the message header (all header fields) is shown.
Use Copy message header to copy the message header to the clipboard. You can Select the Microsoft Message Header Analyzer link to analyze the header fields and values in depth.
Upon selecting Microsoft Message Header Analyzer, a redirect will occur, paste the message header into the Insert the message header you would like to analyze section and then select Analyze headers.
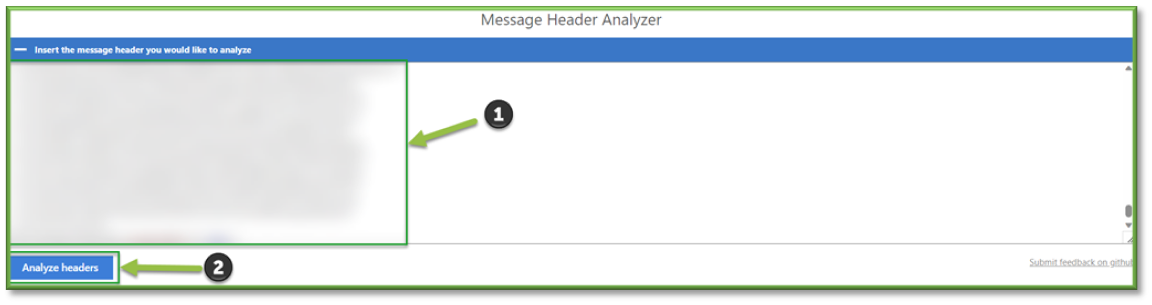
Once the analysis has been conducted, a report will be generated below that will house all the necessary information to conclude how to handle the quarantined message.

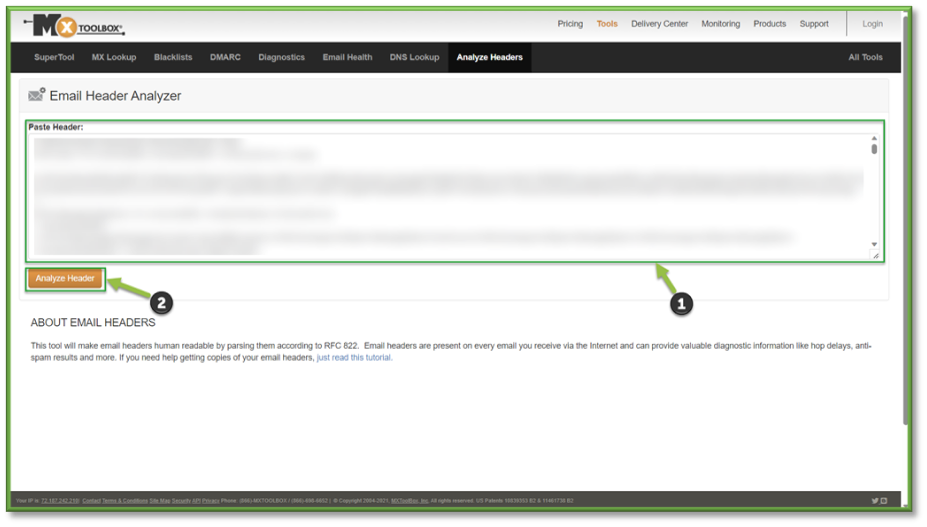
Alternatively, if you want an additional set of eyes on the situation you can utilize another web app such as mxtoolbox to conduct email header analysis, just paste in the previously copied headers into the utility to get another report.

- Preview Message
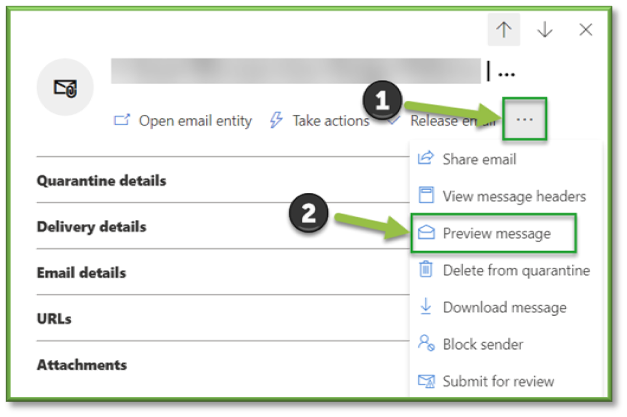
In the flyout that opens, choose one of the following tabs:
- Source: Shows the HTML version of the message body with all links disabled.
- Plain text: Shows the message body in plain text.

Previewing the Message with source formatting can shine some light on possible indicators of illegitimate mail such as grammatical errors, weird links, poor formatting structure, etc.

- Delete from Quarantine
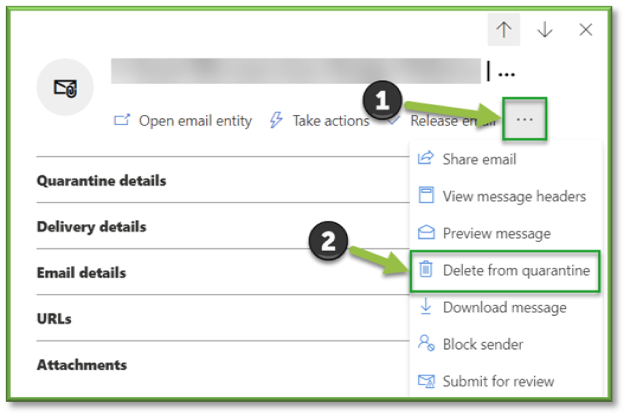
When you delete an email message from quarantine, the message is removed and isn't sent to the original recipients.
If you don't release or remove a message, it's automatically deleted from quarantine after the date shown in the Expires column.
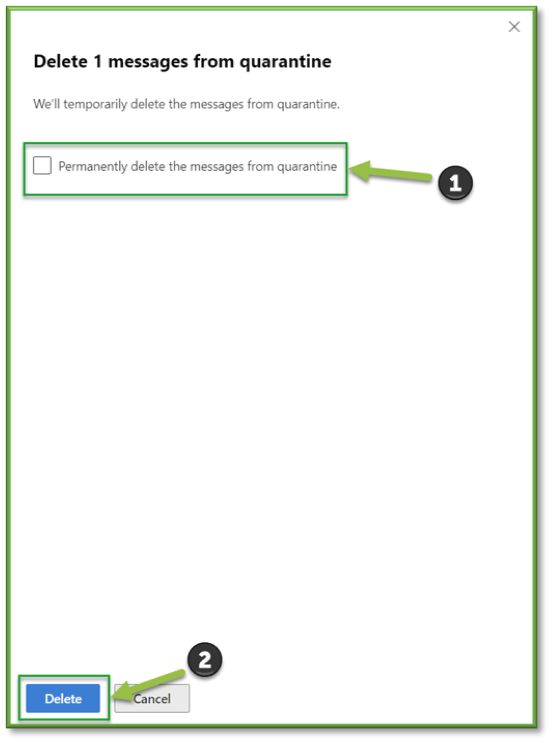
In the Delete (n) messages from quarantine flyout that opens, use one of the following methods to delete the message:
- Select Permanently delete the message from quarantine and then select Delete: The message is permanently deleted and isn't recoverable.
- Select Delete only: The message is deleted, but is potentially recoverable.

- Download Message
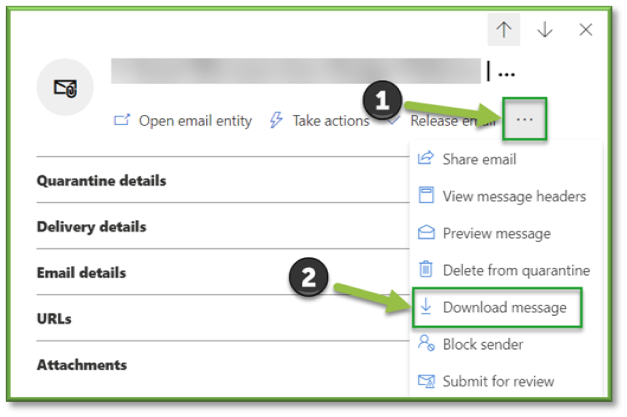
In the Download file flyout that opens, enter the following information:
- Reason for downloading file: Enter descriptive text.
- Create password and Confirm password: Enter a password that's required to open the downloaded message file.
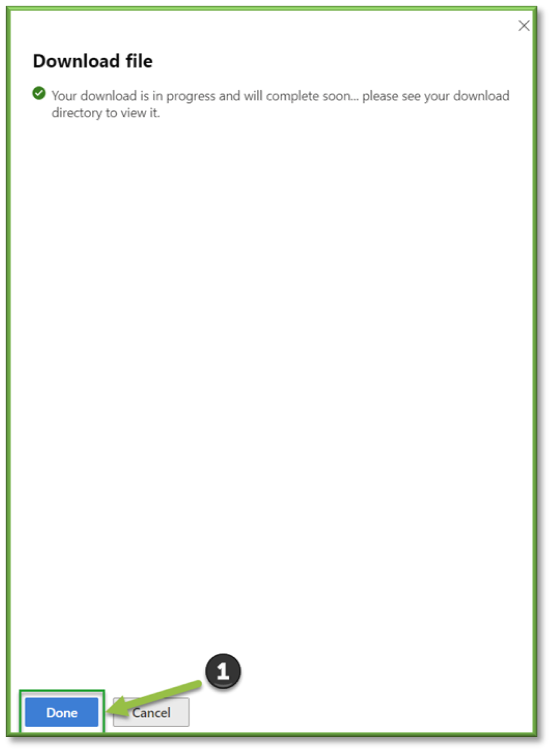
- When you're finished on the Download file flyout, select Download.

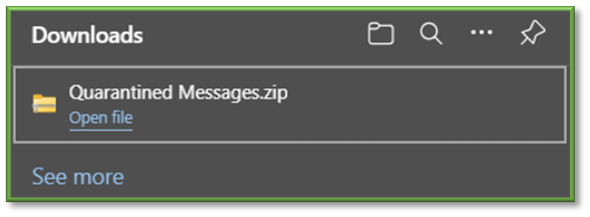
When the download is ready, a Save As dialog opens for you to view or change the downloaded filename and location. By default, The .eml message file is saved in a compressed file named Quarantined Messages.zip in your Downloads folder. If the .zip file already exists, a number is appended to the filename (for example, Quarantined Messages(1).zip).
Accept or change the downloaded file details, and then select Save.
Back on the Download file flyout, select Done.

- Block Sender
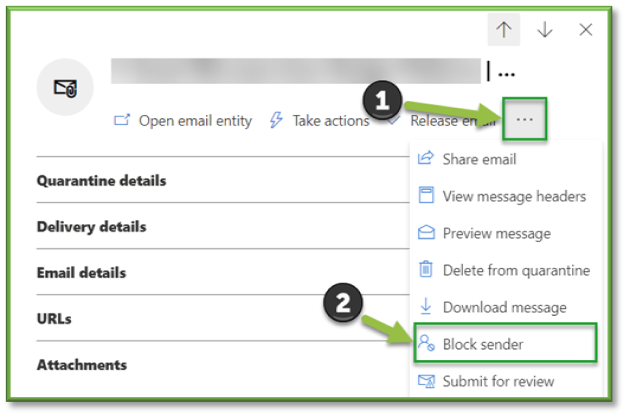
The Block senders action adds the sender of the selected email message to the Blocked Senders list in the mailbox of whomever is signed in. Typically, this action is used by end-users if it's available to them by quarantine policies.
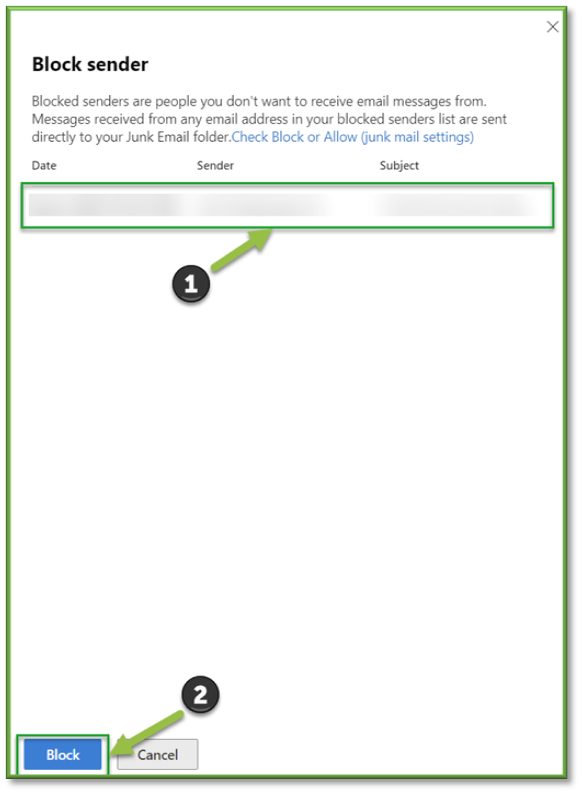
In the Block sender flyout that opens, review the information about the sender, and then select Block.

- Submit for review.
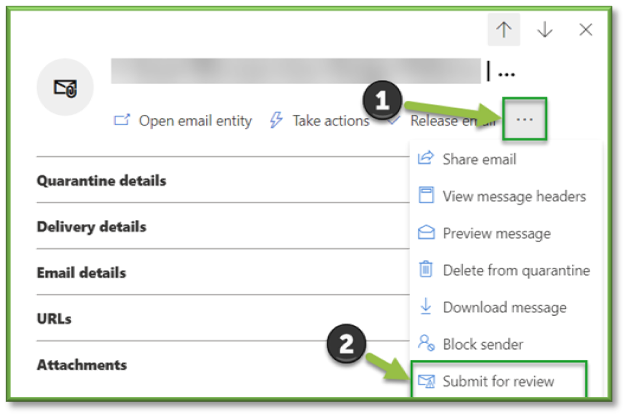
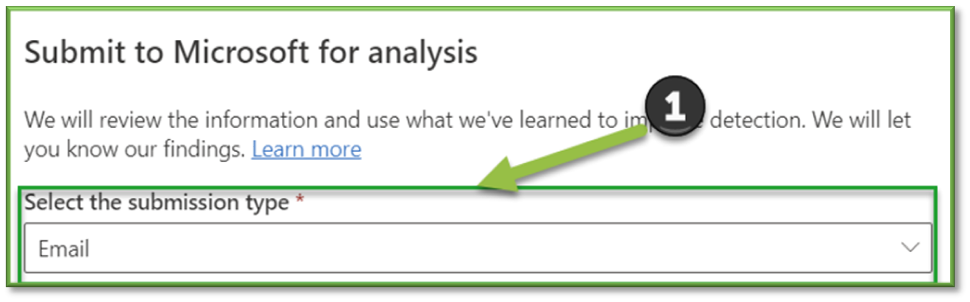
In the Submit to Microsoft for analysis flyout that opens, configure the following options:
- Select the submission type: Select Email (default), URL, or File.
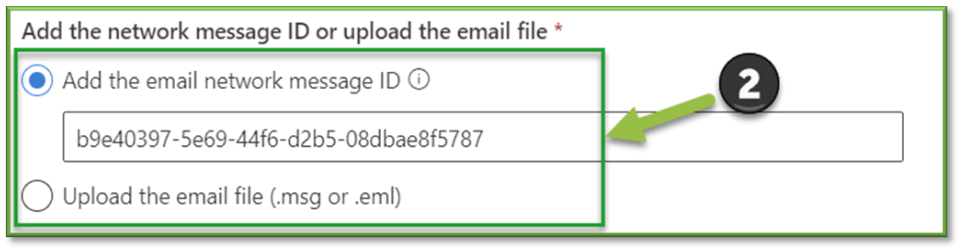
- Add the network message ID or upload the email file: Select one of the following options:
- Add the email network message ID: This value is selected by default, with the corresponding value in the box.
- Upload the email file (.msg or eml): After you select this option, select the Browse files button that appears to find and select the .msg or .eml message file to submit.
- Choose a recipient who had an issue: Select one (preferred) or more original recipients of the message to analyze the policies that were applied to them.

- Select a reason for submitting to Microsoft: Choose one of the following options:
- Should not have been blocked (false positive) (default): If you select this option, the following settings are available:

- Should not have been blocked (false positive) (default): If you select this option, the following settings are available:
-
- Allow email with similar attributes: If you select this option, allow entries are added to the Tenant Allow/Block List for the sender and any related URLs or attachments in the message. The following options also appear:
- Remove entry after: The default value is 30 days, but you can also select 1 day, 7 days, or a Specific date that's less than 30 days.
- Allow entry note: Enter an optional note that contains additional information.

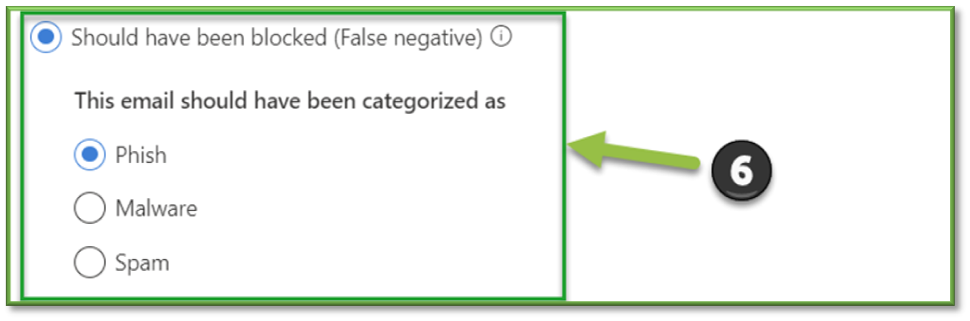
- Should have been blocked (false negative): If you select this option, the following settings appear:
- The email should have been categorized as: Select Phish, Malware, or Spam.
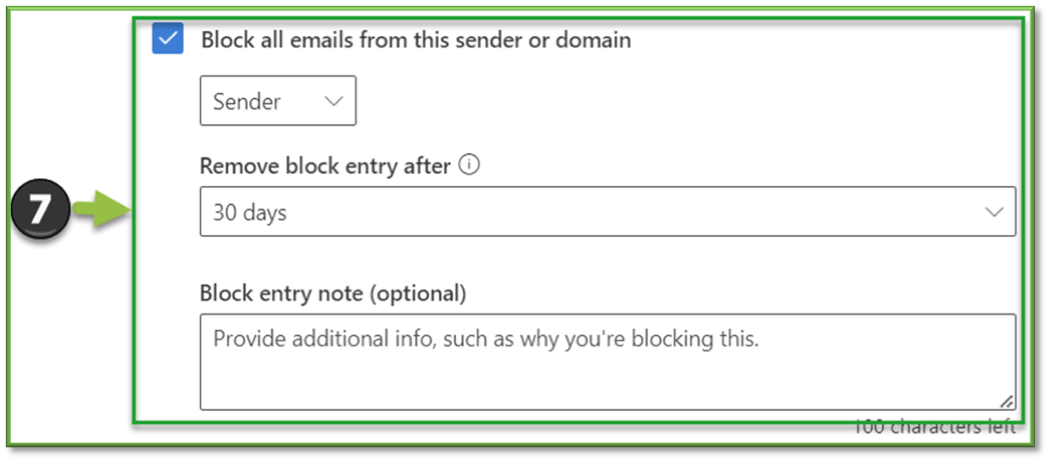
- Block all email from this sender or domain: If you select this option, block entries for the Sender or Domain (you choose) are added to the Tenant Allow/Block List.
- Remove block entry after: The default value is 30 days, but you can also select 1 day, 7 days, 90 days, Never expire, or a Specific date.
- Block entry note: Enter an optional note that contains additional information.
- When you're finished on the Submit to Microsoft for analysis flyout, select Submit.

You're Finished!
You should have successfully viewed the Quarantined Email Queue; this area will host all emails that have been held due to threat policy compliance failure, additional analysis on email will need to be conducted to gage if this hold was necessary or not. Utilizing the message details associated with the email and performing the necessary action to handle the message will be necessary. For any other problems or questions, reach out to us!