
Before You Begin
You must have a Temporary Access Pass (TAP) credential from your administrator before you start. This is a short-term passcode they will send to you ahead of time.
You'll use this guide when setting up:
- A brand-new device, or
- A device that was just reimaged (wiped and reset).
Why TAP matters: During setup, you'll be asked to sign in with your Work or School account. This step requires a stronger form of sign-in verification either the Microsoft Authenticator app (passwordless) or a TAP credential from your administrator. If you don't have a TAP credential ready when you reach the account sign-in step, setup will fail and you won't be able to continue.
Applicable Scope: Users
Required Group Membership: N/A
Using TAP During Out-of-box Onboarding
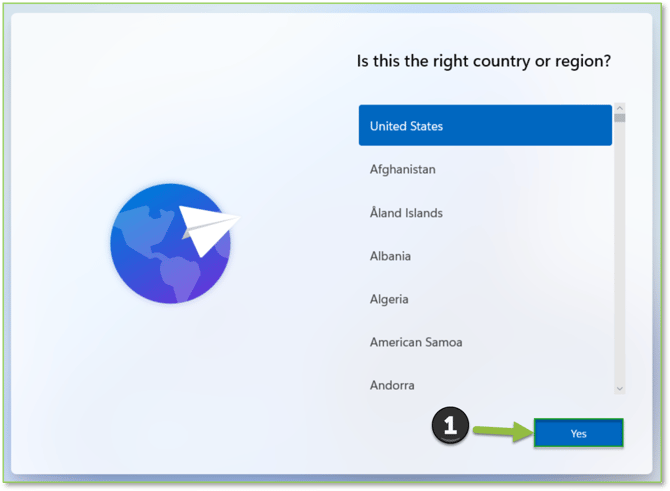
- When the device powers on, the first screen asks where you're located. Select the country or region that matches your geographic location, then select Yes to confirm your choice and continue.
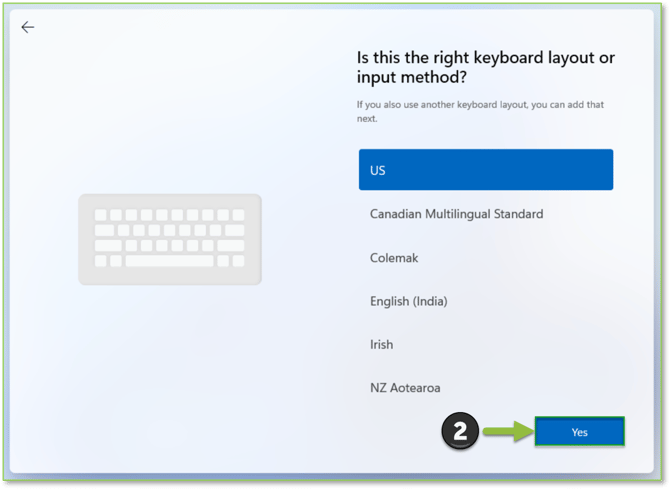
- Next, you'll be asked to pick a keyboard layout. Select the keyboard layout that matches your geographic location, then select Yes to confirm your choice and continue.
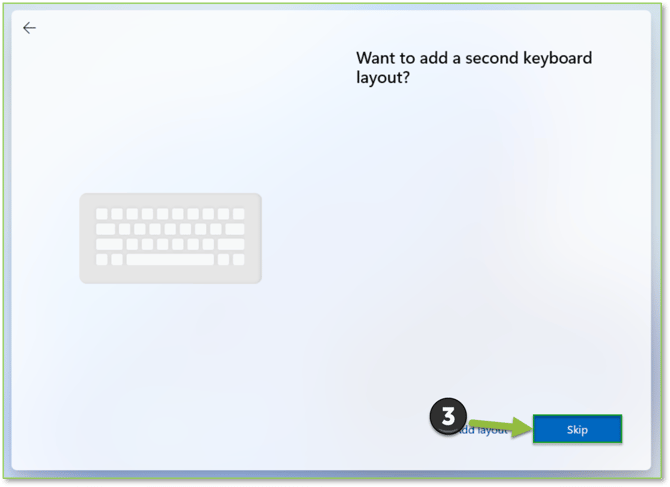
- Windows may then ask if you'd like to add a second keyboard layout, if you need an additional layout, you can add it here, otherwise select Skip to continue.
- You'll be prompted to Connect to a network. Select your Wi-Fi network from the list and enter the password if one is required or connect your device to an Ethernet connection instead.
- You can enter a device name in the text box or skip this and let the device automatically take the naming scheme applied through your organization's Autopilot Deployment Profile in Intune. Based on your choice, select Skip or Next to continue.
Important: device names have a 15-character limit. This prompt won't warn you if you go over, but exceeding the limit will cause an immediate device compliance failure, so if you do name the device manually, keep it to 15 characters or fewer.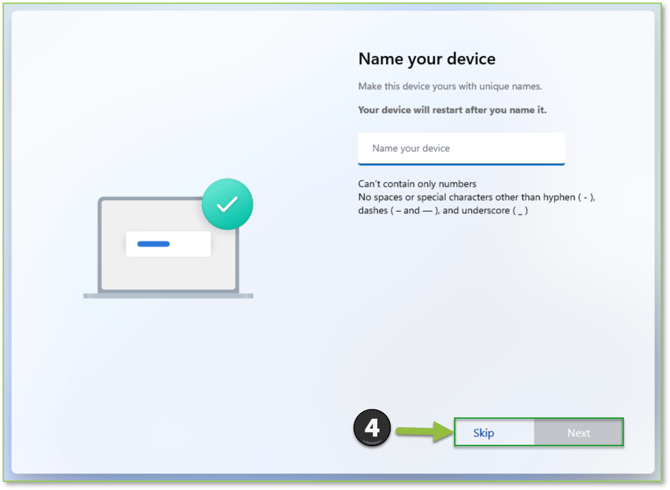
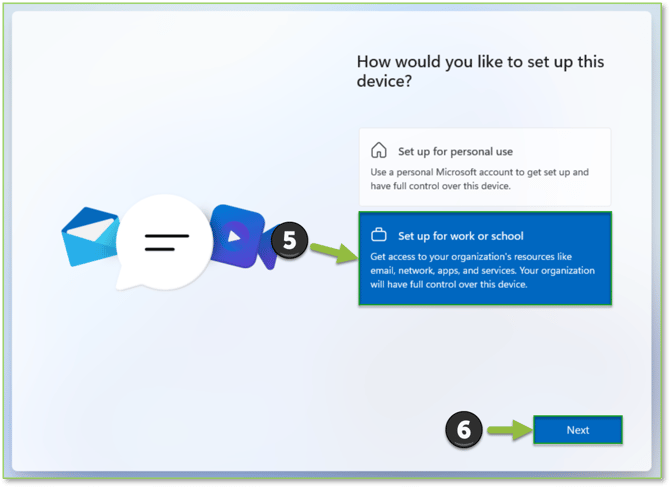
- At the How would you like to set up this device? prompt, select Set up for work or school, then select Next to continue. This is the correct choice for joining the device to your organization through Intune. If you pick the wrong option, the device won't be set up as an organizational device, this isn't a hard block on Intune onboarding, but it will make the process more complicated.
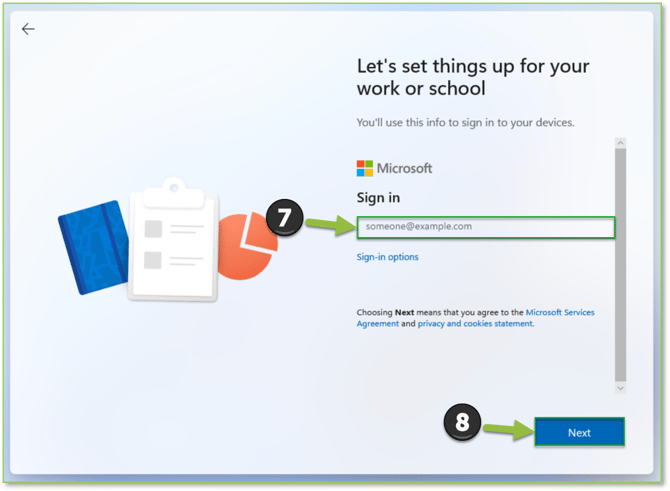
- At the Let's set things up for your work or school prompt, enter your organizational email address in the Sign in field, then select Next to continue.
- On the next page, you should see an Enter Temporary Access Pass prompt with a text field. This is where you'll enter the TAP credential your administrator or management team gave you earlier. Enter it, then select Sign in to continue.
If you don't see this page, it usually means one of two things: your administrator didn't create the TAP before you started, or the TAP expired between when it was created and now. If that happens, reach out to your technical contact so they can fix it. In some cases, the system may ask for your password first and then prompt for the TAP, if so, entering your password should bring up the TAP as your verification (MFA) method. You can also select Sign in another way to check whether TAP is listed as an available option.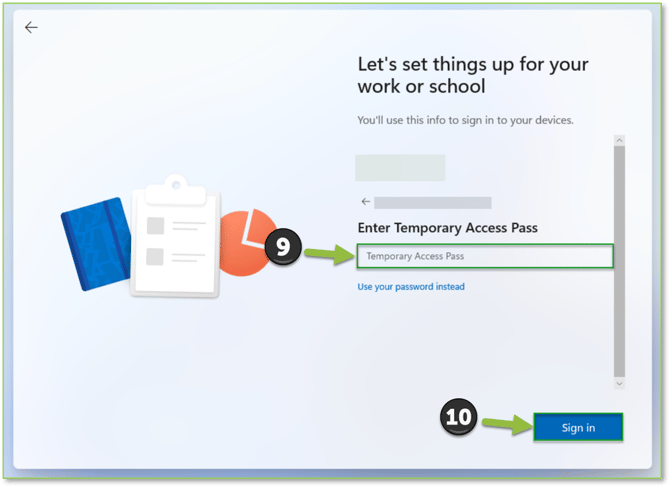
- Once your account is verified, your device will move into the Enrollment Status Page. This screen shows the progress of your device as it connects to Entra ID and Intune and works through each stage of setup.
- You may be asked to verify yourself again using your TAP credential. You may also see a standard Windows sign-in prompt asking for your username and password, this is normal and is typically required to build your user profile on the device.
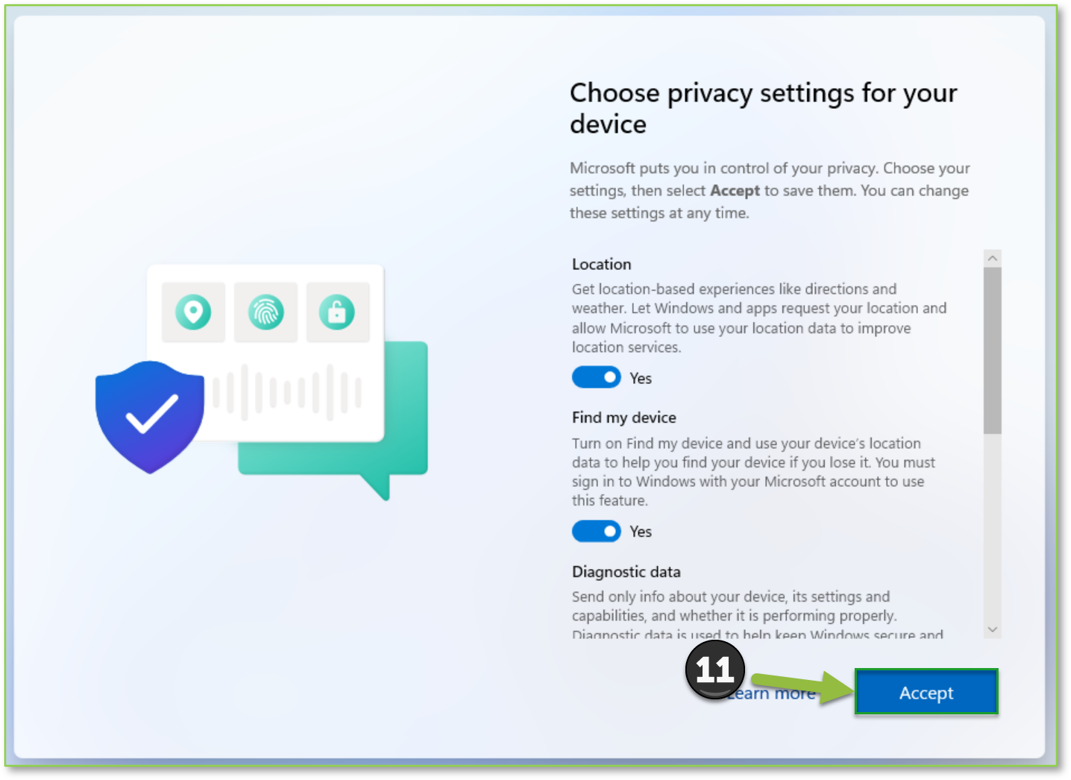
- Once your device is fully connected to your organization, you'll be prompted to choose some local privacy settings. You can configure these however you like, though keeping exposure to a minimum is generally preferred. Select Accept to continue.
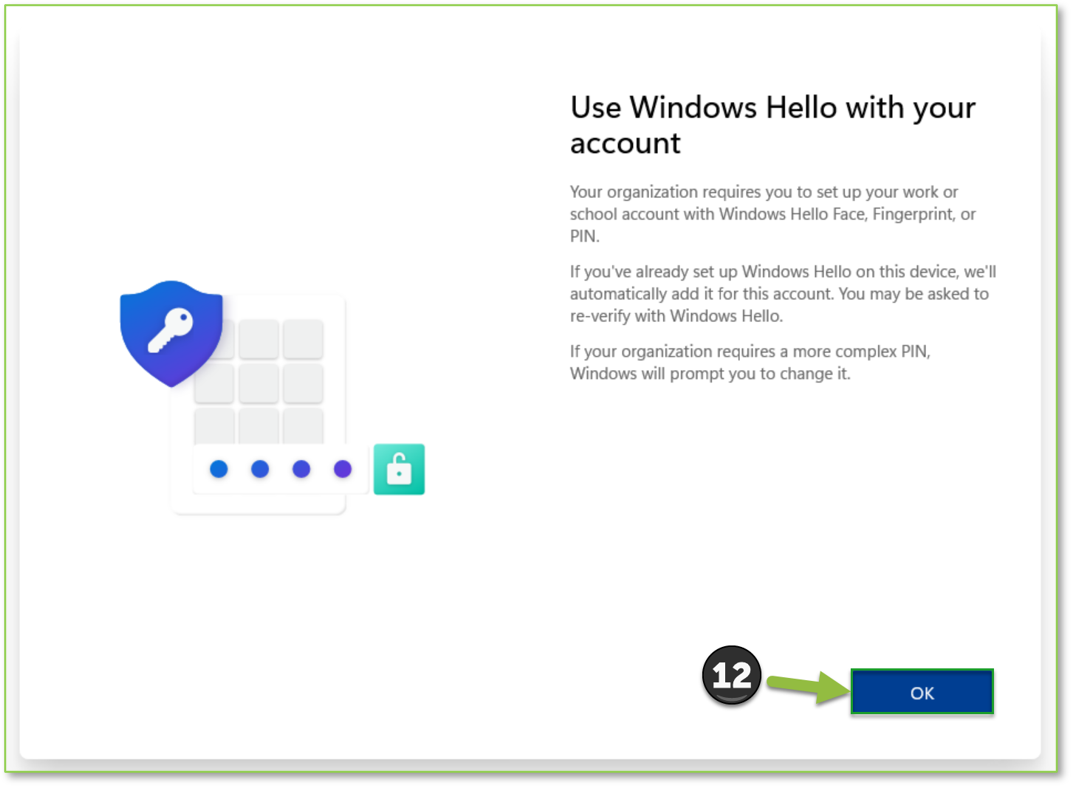
- After your privacy settings are set, you'll be prompted to create a Windows Hello PIN for your device. You'll also be asked to enter your TAP credential one more time. Once you've entered the TAP credential and created a PIN that meets your organization's requirements, you should land on your device's desktop indicating that setup is complete.
- After your device reaches the desktop, it's recommended that you run Windows Updates to make sure your operating system is on the latest version and that any Windows Defender Antivirus signature updates, driver updates, and other components are fully applied. Doing this reduces the chance that your device immediately fails compliance due to missing Windows components or outdated protection. It may also help to run a local sync on your device from Settings > Accounts > Access work or school.
- Remember that MFA setup happens after your device is reporting as compliant. At that point, you'll be able to set up a Microsoft Authenticator app instance on your mobile phone, with the option to later upgrade to the passwordless authenticator app experience.
Need Assistance?
Reach out to your Customer Success Manager to discuss how a Sittadel cybersecurity analyst can assist in managing these tasks for you. New to our services? Inquire about arranging a consultation to explore optimizing your Azure environment for painless management.