.png?width=190&height=95&name=Sittadel%20Header%20Logo%20(2).png)
This method of enrolling has only been validated to work on machines that have an existing Entra ID device record and have a Connected to XXX entry within the Settings > Account > Access Work or School section locally on the machine but do not actively show up in Intune or have a Managed by XXX entry when the Connected to XXX entry is expanded.
Locally Assigning Administrative Privilege
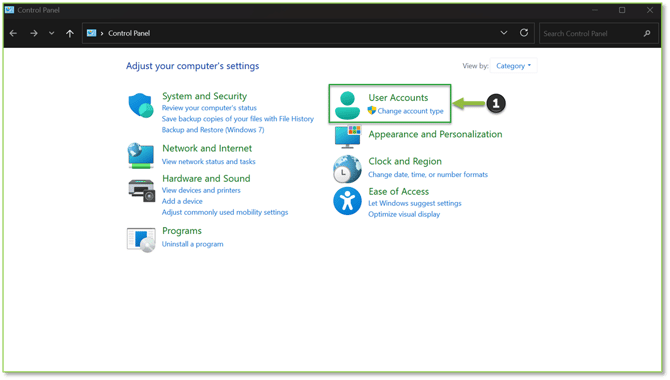
- For devices confirmed as Entra ID–joined and not MDM (Intune)-enrolled, we will want to open the Control Panel utility and choose the User Accounts header.
Note: This verification can be observed in Settings > Accounts > Access work or school, a device meets the criteria if you see a Connected by XXX entry that, when expanded, shows only a Disconnect this account setting with a Disconnect action (no Managed by XXX setting and no Info action). Seeing Enroll only in device management under Related settings—even with a Connected by XXX entry—also indicates it’s not MDM-enrolled.
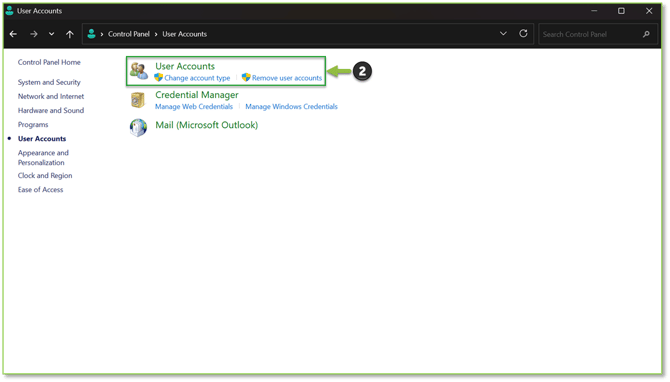
- After the User Accounts section opens, we will want to choose the Change account type action under the User Accounts header.
Note: If a UAC prompt appears, you must provide an administrator username and password to continue; you can’t proceed without admin privileges on the local session.
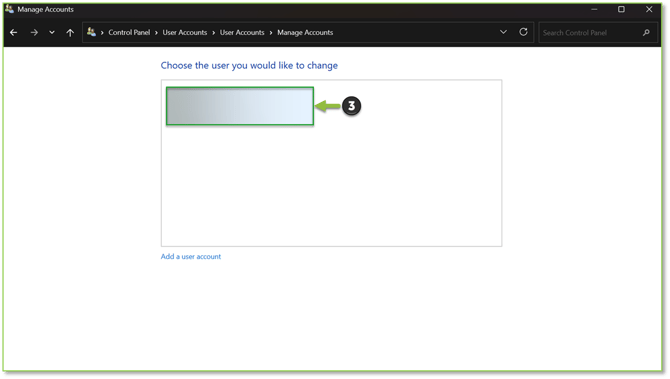
- After you select Change account type and approve the UAC prompt, you’ll see all accounts on the device—select the profile for the primary user.
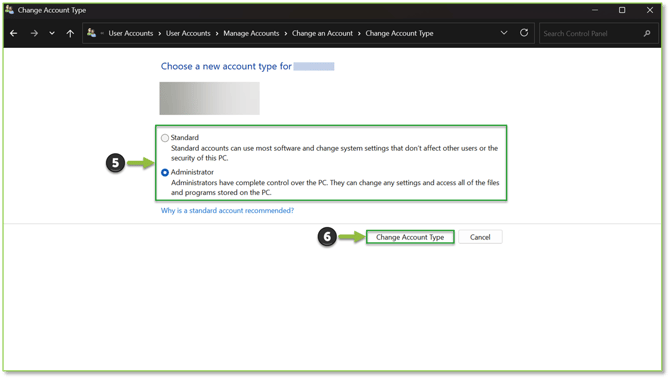
- With the user selected, the Account panel opens—choose the Change the account type action.
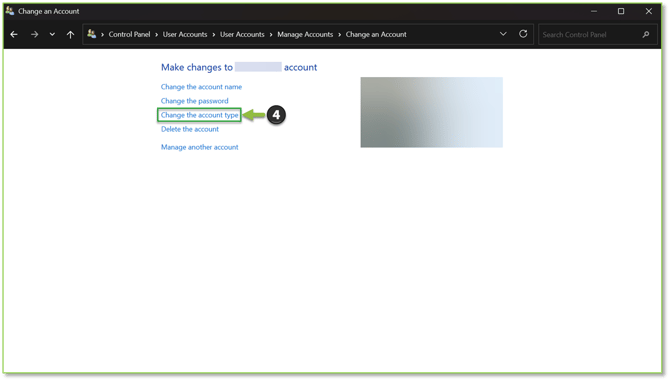
- In the Account type section, temporarily set the account to Administrator, then select Change Account Type to apply; after MDM enrollment has taken place, we will want to revert the account back to a standard user.
- After granting temporary admin rights, restart the device—or sign out and back in—to apply the change; otherwise, the next steps will fail with insufficient privileges errors.
Locally Enrolling Device For MDM
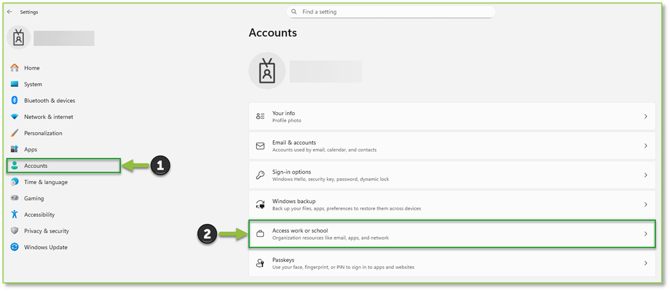
- Once you’ve granted temporary admin rights and restarted/signed back in, open the Settings utility. Go to the Accounts tab and select the Access work or school setting.
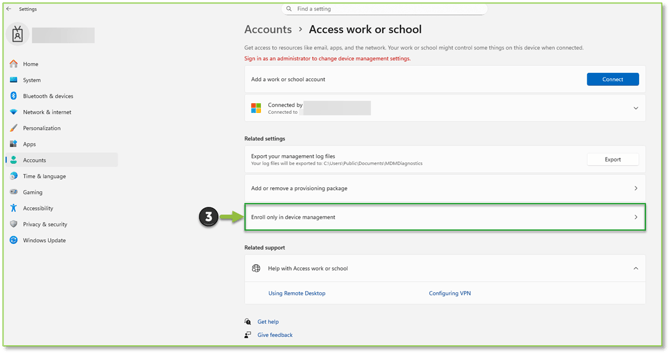
- In the Access work or school section, you’ll see the device is connected to your organization’s Entra ID but not managed by your organization’s MDM (Intune instance). Click the Enroll only in device management setting.
Note: This action does not remove the existing Entra ID device record. It adds the device to Intune and updates the Entra ID entry to show MDM and Security settings management: Microsoft Intune, and the device appears as Autopilot within the Entra ID portal.
- In the text field, enter the user’s work account email (UPN as shown in Entra ID). Click Next to proceed to authentication.
Note: Before enrolling, confirm the user has an eligible Microsoft 365 license (Business Premium, E3, or E5) and the device runs Windows Pro or higher; otherwise, onboarding can fail or misconfigure the device.

- After entering a valid UPN, a Microsoft sign-in window opens—enter the account password and select Sign in.
Note: If MFA is required, complete the additional prompts after entering your password. Access isn’t granted until MFA is satisfied.

- After successful authentication, you’ll see the device setting up to connect to your workplace—this confirms the action has succeeded; select Got it to continue verifying the local-to-cloud connection.

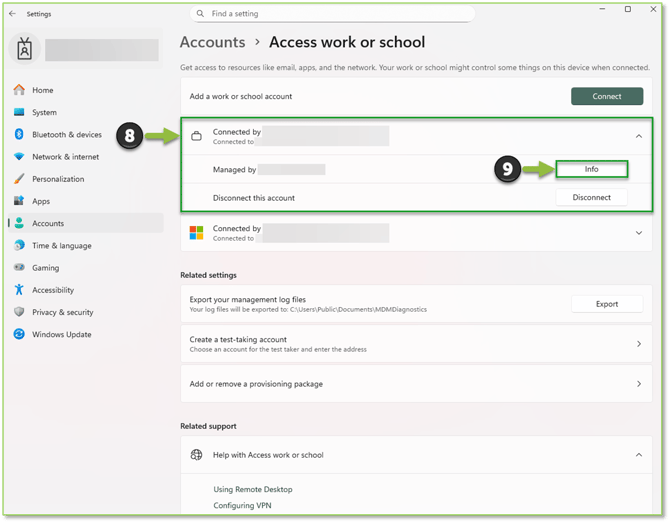
- Return to Settings > Accounts > Access work or school and look for the briefcase-icon Connected by XXX entry. Expand it, then choose the Info action next to the Managed by XXX setting to start a local sync with Intune.
- In this pane, scroll to Device sync status and select Sync to force a check-in with Intune and pull configuration settings.
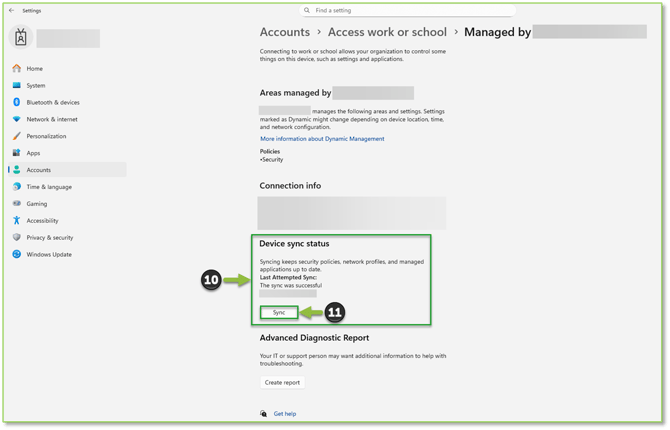
- After selecting Sync, wait for The sync was successful prompt (typically 5–10 minutes). If no confirmation appears and the page seems stuck, leave this section and return, then try Sync again. Next, go to the Intune portal to trigger a cloud sync for the device and set the desired ownership.
Verifying Intune Connectivity
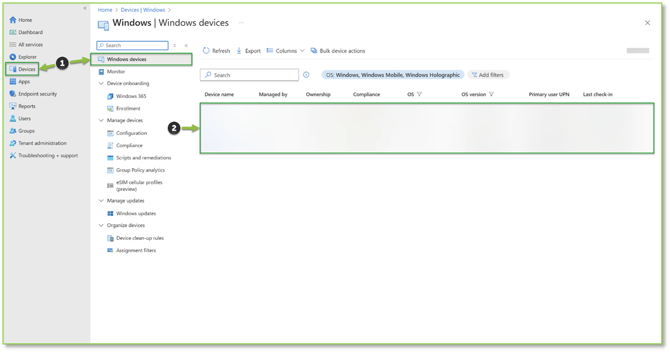
- Open the following Intune Devices link and confirm the machine now appears. From the list, select the device that just completed MDM enrollment.
Note: The device might not show up immediately. Keep triggering local Sync on the device and refresh/reopen this Intune view until it appears.
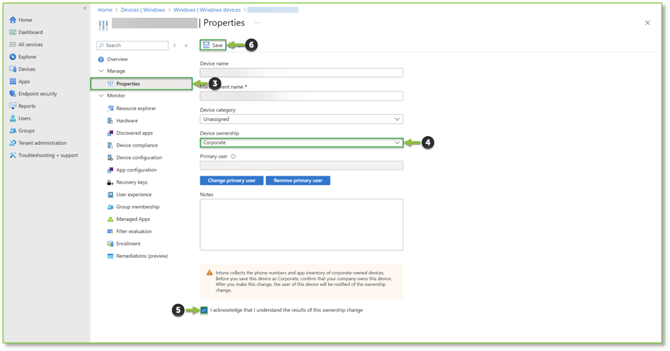
- On the device Overview page, we will want to select the Properties tab. Next, we will want to set Device ownership to Corporate, at least for the purpose of this exercise, followed by checking the acknowledgement box, and selecting Save to finalize the ownership change.
Note: The device ownership step can be skipped if you are wishing to Intune Join the machine as Personal; the default ownership assignment for this join method is Personal.
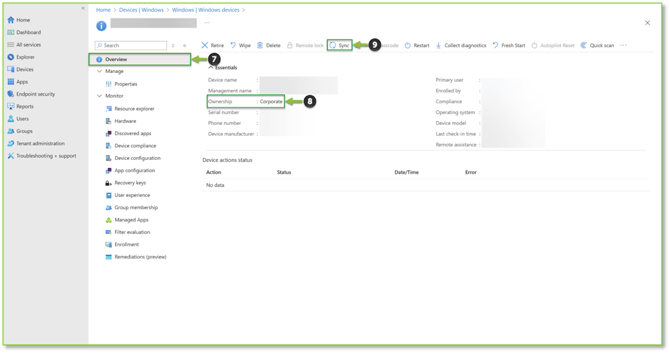
- Return to the Overview page, here we will want to verify that the Ownership is showing Corporate. After verification has been carried out, we will want to select the Sync action to initiate a cloud sync and expedite deployment of ownership-scoped settings to the newly enrolled MDM device.
Note: If the desired device ownership is Personal; the ownerships should show Personal and you will just want to move to conducting the cloud sync action on the device.
- Continue cycling local Sync (on the device) and cloud Sync (in Intune) until the ownership-scoped configuration profiles apply and the device reaches a Compliant state. Reporting in the Intune portal can lag by up to 20 minutes—the Policies section on the same device page where you trigger local Sync (on the device) is the source of truth. If results don’t align, restart the device and let the initial post-startup sync run, then recheck.
Need Assistance?
Reach out to your Customer Success Manager to discuss how a Sittadel cybersecurity analyst can assist in managing these tasks for you. New to our services? Inquire about arranging a consultation to explore optimizing your Azure environment for painless management.