.png?width=190&height=95&name=Sittadel%20Header%20Logo%20(2).png)
 Role Requirements
Procedure Scope: Administrators
Required Group Membership: Admin.Security
![]()
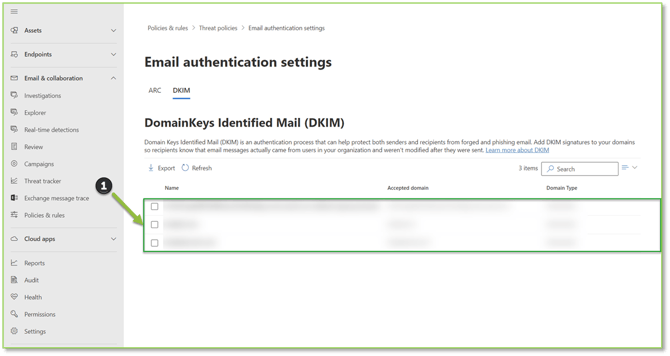
- Navigate to the DKIM Email Authentication – Microsoft Defender portal, locate and select the domain you wish to configure DKIM with from the list.
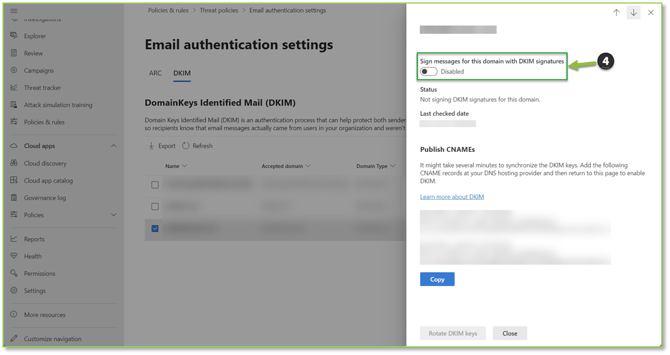
- A flyout will be displayed, locate, and select the Create DKIM keys action.

- A message will appear asking you to add the specified CNAME records to DNS. Copy the records by selecting the Copy action, perform the DNS addition and publication as your DNS provider recommends.

- Once you have added the necessary records to your DNS provider, return to the DKIM page and reselect the domain that the CNAME records have been created for. In the window, select the Enable ribbon. If the records have been configured successfully, the switch will turn to Enabled and outbound mail will be DKIM signed.
Need Assistance?
Reach out to your Customer Success Manager to discuss how a Sittadel cybersecurity analyst can assist in managing these tasks for you. New to our services? Inquire about arranging a consultation to explore optimizing your Azure environment for painless management.